What is Canva?
Canva is a graphic design application that aims to allow you to design visual materials without the need for extensive graphic design experience. Typically, the tool is used to create social media graphics, simple videos, presentations, slides, posters, and other visual resources - and a wide range of customizable templates and royalty-free images are provided to help users do this easily.
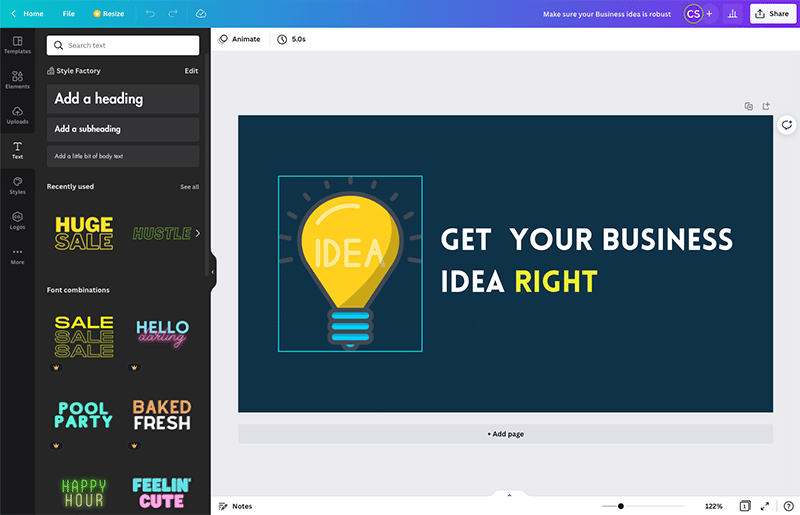
Unlike traditional graphic design tools like Adobe Illustrator and Photoshop, Canva's learning curve is designed to be extremely smooth. This means that its feature set is more basic than these types of “pro” solutions, but its price is also considerably lower.
Launched in 2013 by the tech entrepreneur Melanie Perkins, Canva is now an extremely popular solution for creating designs, with over 75 million monthly active users in over 190 countries.
Over 10 billion designs have been created with this tool and 2,500 people now work for the company.
How does Canva work?
Canva can be used either in a web browser or as a downloadable application (for Mac, PC, Chromebook, iOS, or Android).
It gives you three key elements to help you create your design:
- templates: pre-designed layouts that you can use for a wide range of applications (for example, to create presentations, videos, ads, infographics, or graphics)
- design elements: royalty-free photos, videos, and graphics that you can add to your Canva templates
- a drag-and-drop editor: it allows you to move elements within a model.
Additionally, Canva offers controls for changing the fonts and colors used on a template; it also allows you to create custom templates.
The idea is to choose a template, drop content into it, make some changes, and then export your design for use online or as a printed article.
But how easy is this in practice?
Ease of use
When you log on to Canva, you are asked a question: “What are you going to draw?”
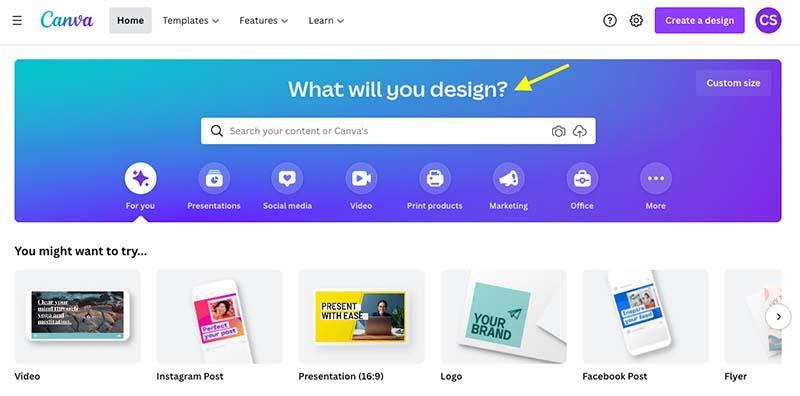
You can answer this question by entering design ideas into the design search bar, or by clicking the icons below to access suggested layouts for presentations, social media posts, videos, print products, and more.

In any case, you'll have a wide range of models to choose from. You can choose one of these as the starting point for your design.
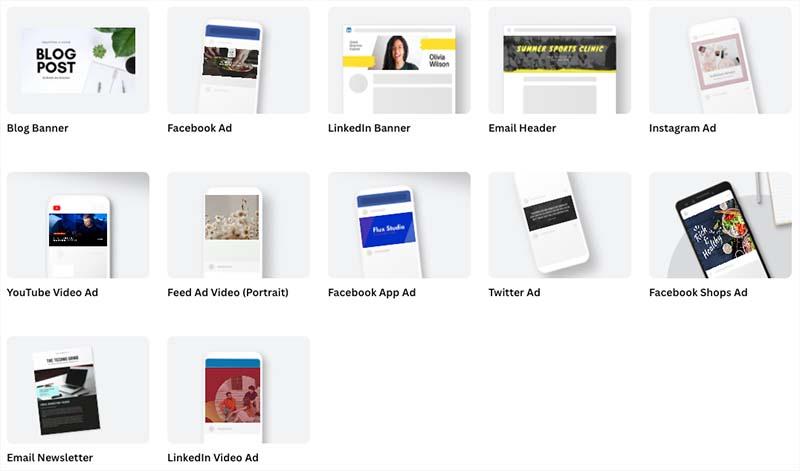
From there, it's a matter of modifying the model to suit your needs. To do this, click on one of the design elements (text, visual, etc.) and use the controls that appear above to change that element.
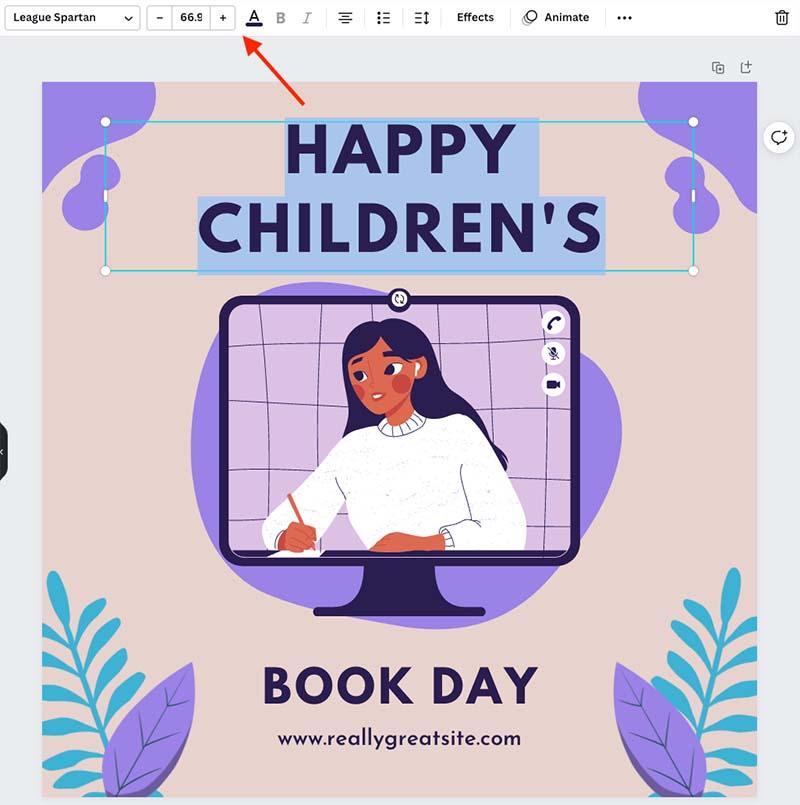
You can also replace the content of the placeholder with your own images or text (or add additional images and text).
To add an image, you can either search for an item in the Canva Item Library (hundreds of thousands of items are available, and I've never come across a search phrase that isn't properly taken into account).
Simply click on an element to add it to your design, and you can easily resize it to fit your needs.

To edit the text, simply overwrite the existing copy or use the “text” tool (shown below) to add new headings or a new body of text.
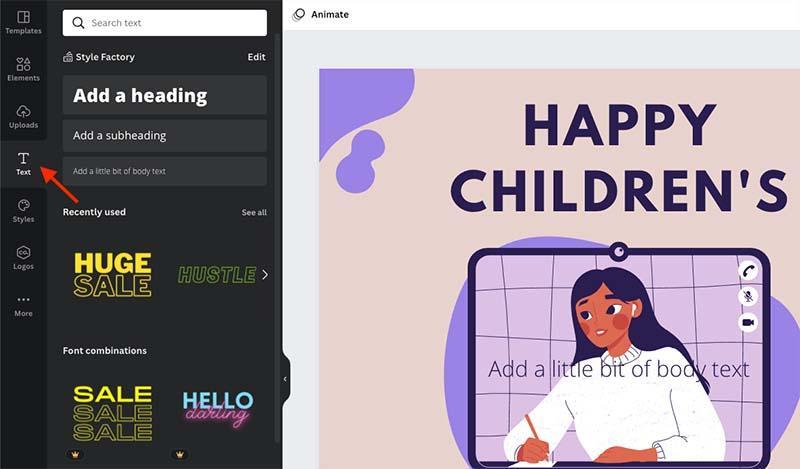
Ultimately, the process of creating a design in Canva is simple and the interface is extremely user-friendly - anyone who has used a simple word processor or graphics tool will find the learning curve almost non-existent.
(It's also worth noting that the fact that the Canva interface is available in over 130 languages also contributes to its ease of use.)
So we can say that Canva is achieving its goal of making graphic design accessible to non-designers.
Add your own resources
While one of Canva's main goals is to provide you with everything you need to create designs in one place (photos, videos, fonts, templates, etc.), it also allows you to import your Clean resources.
You can do this through its “downloads” section, which allows you to import images, videos, or audio to your Canva account. (It also allows you to record a video of yourself.)
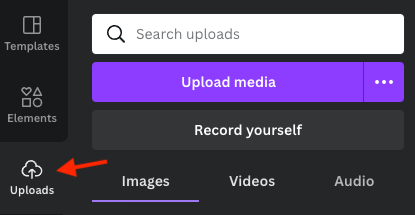
Once you have downloaded an asset, you can simply retrieve it from the “images”, “videos”, and “audio” tabs provided and insert it into your projects.
You can also add your own custom fonts to Canva - more on that in a moment.
Photo editing options
Once you've added a photo to a design, you can easily edit it using Canva's photo editor (just click on a photo and then click the “Edit Image” button).
This gives you access to a set of simple commands that allow you to change the appearance of this image in a variety of ways. Sliders for adjusting brightness, contrast, and saturation are provided, and you can also make use of Instagram-style filters.
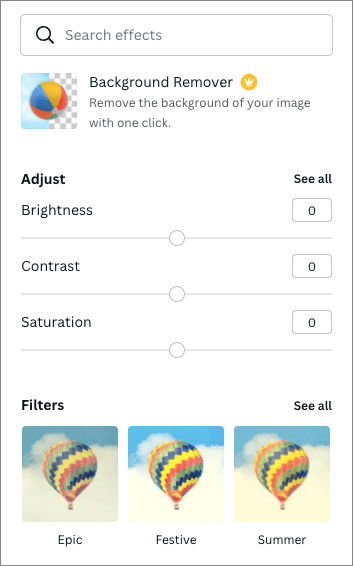
There is also a handy “background removal” tool that allows you to remove or replace the background from photos. This tool is especially useful for creating passport photos for websites or thumbnails for YouTube videos.

Like many other elements of Canva, image editing commands are very limited. But they include the tools that are arguably the most relevant for the majority of users.
Video editing
In addition to allowing you to create “static” designs, Canva also allows you to create videos. The video creation process works very similarly to designing static content: you choose a template, edit it, and add clips to your video as needed.

Clips can be imported into Canva's download section, or you can add them from its extensive stock video library (found in the “Items” section). You can also use your webcam to record video directly in Canva.

The clips themselves can be edited - for example, you can crop, flip, or animate them. But one of the most impressive adjustment features is Canva's new video background removal feature (shown below).
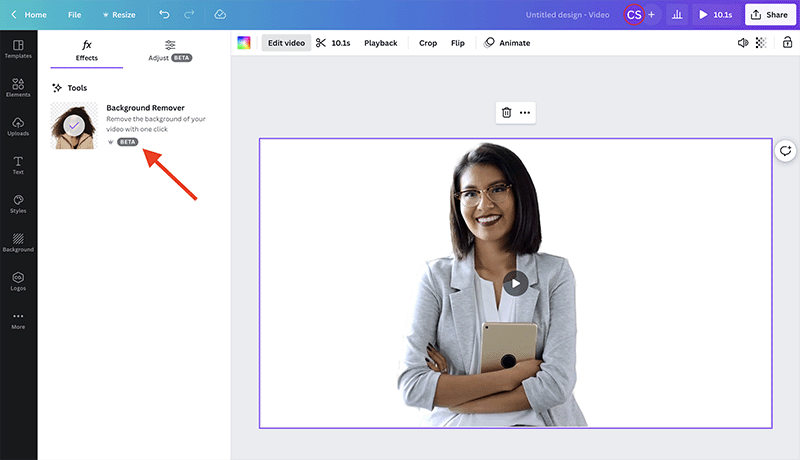
Using the video background removal tool in Canva
While this feature is currently only available in BETA mode, and only works with videos up to 90 seconds in length, it is very effective at removing loaded backgrounds behind speakers - and just as easy to use as Canva's background remover for static images.
Once your video clips are in place, a timeline allows you to drag and drop them, cut them, and create your final edit. You can also add audio to your video from a royalty-free library of over 25,000 music songs/sound effects.

While the video creation functionality offered by Canva is nowhere near as extensive as what you'd find in a dedicated video editing application — you won't be able to play with a wide range of transitions, or professionally calibrate your video content, for example — it is hugely usable, and built-in video and audio libraries can help users save plenty of time and money.
Features
1. Create charts
While Canva is often considered to be the ideal tool for creating graphics for social media, it also offers some very useful (and often overlooked) functions for creating charts and graphs.
You can create up to 11 different chart types using Canva, including bar charts, line charts, pie charts, histograms, and more.
This function is extraordinarily easy to use: all you need to do is enter your data into a table on the left side of the Canva interface, which Canva then automatically transforms into a table or graph (see screenshot below).
These can be exported to various file formats or integrated into websites via a code snippet (the latter method of presentation allows you to update your data in Canva and automatically display the most recent graphics on your site).
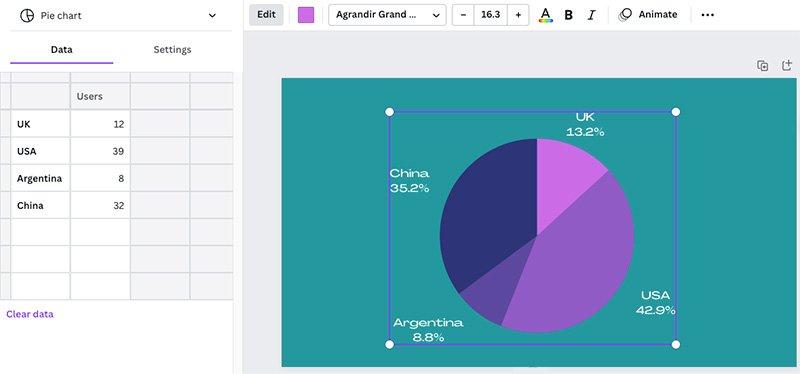
For me, this is a remarkable feature of the tool, which allows you to present statistics in a very simple and very attractive way.
2. Exporting your projects
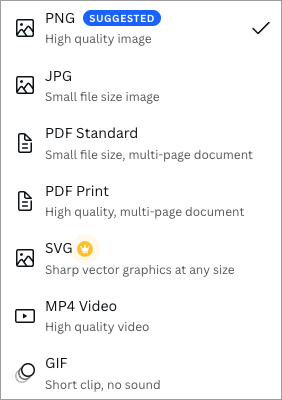
Once you've created your design or video in Canva, you can export it to a variety of formats, including:
- PNG
- JPG
- PDF (low resolution and print quality).
- SVG
- MP4
- GIF
To be honest, compared to professional design tools (or even similar “prosuming” tools like Adobe Express), this is a fairly limited range of output formats, and this represents one of Canva's main disadvantages.
If you're using professional graphics or video editing software, you'll be able to export your content in just about any format possible, but Canva really limits your options.
Significantly, you can't export to Adobe Photoshop PSD, which means that if you want to start a design in Canva and then send it to a professional graphic designer to improve it, you're out of luck. (There are workarounds to address this situation - involving converting files to PDF and using third-party tools to separate layers - but they are impractical.)
And only one video export format is provided: MP4 (with no options to adjust its size or quality).
To be honest, Canva covers the essentials with its output formats, and many of its users won't really need a bunch of additional formats; the main purpose of the product is to allow people to create quickly and export simply. For most applications, the range of export formats will be fine (especially if you're using Canva to create content for online consumption).
But some users will regret not being able to produce documents in the format of their choice.
3. Collaboration
Organizing your work in Canva is fairly simple. A simple folder structure allows you to create folders that house your creations.
If you have a “Canva for Teams” offer, these folders can be shared with other team members, who can then edit the creations they contain. It works similarly to Dropbox and other sharing services: simply share a folder with a team member by entering their email address in the folder settings.

It should be noted that to share a folder with a team member, you first need to create a “team” in Canva.
The “Canva for Teams” plan offers you 5 user accounts by default. Additional fees apply when you add team member accounts to your plan.
Can a Canva project be saved?
While Canva uses a traditional file and folder-based approach to organizing your design, it's important to note that there isn't really a way to save your projects using the platform.
You can recover deleted files for a fixed period of time - after deleting a drawing or template, it's stored in a trash folder for 30 days before being permanently deleted (if you delete a team, that team and its contents can be recovered for up to 14 days).
While these grace periods are welcome, they do not replace the ability to save your projects on a device and re-import them in case of accidental deletion of a project (or loss of access to a Canva account).
Yes, you can export your files to PNGs, JPGs, etc. - but these will flatten all the layers in your design, which means that when you import them back into Canva, they will no longer be editable.
4. Magic Resize tool
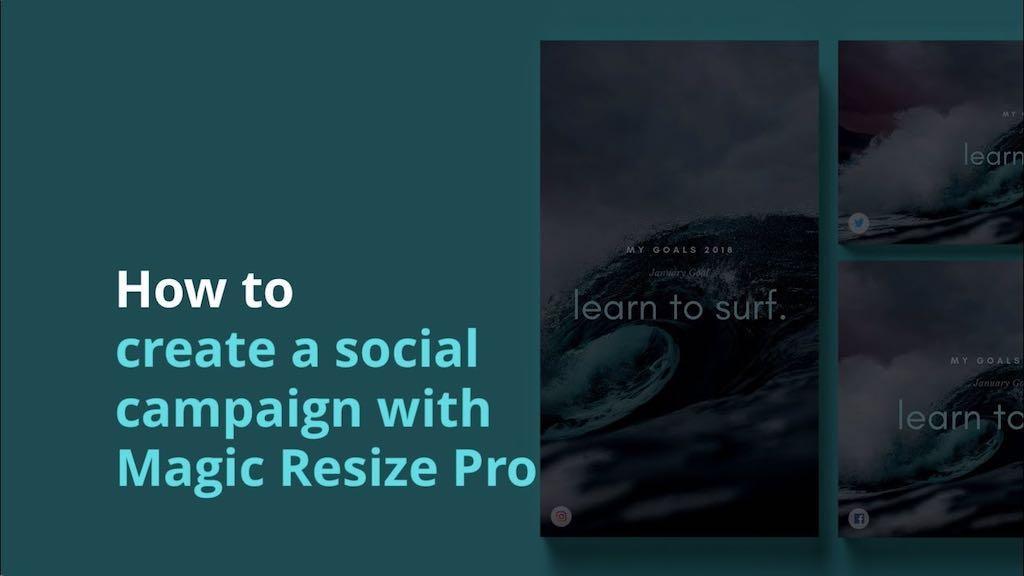
One of Canva's particularly useful features is its “Magic Resize” tool, which allows you to easily repurpose existing designs to different platforms. You can take an existing design and then use the Magic Resize tool to automatically reformat it to suit different social media channels.
In other words, you can usually turn a blog post banner into a Facebook post image or a YouTube video thumbnail by simply clicking a button.
The video below gives you an overview of how this feature works.
Integrate Canva projects
It's important to note that you don't always have toexport your Canva project to a file format. If you're displaying a design digitally, you can alsointegrate. To do so, simply enter a snippet of Canva code and add it to your website. By doing so, you will display your project, but more importantly, you will automatically reflect any changes you make to it in Canva.
5. Create a website
Besides being able to create visual assets with Canva, you can also use it technically to create websites.

However, it should be noted that the platform only allows you to create very good websites. Simple. You can create a one-page brochure with Canva, but that's about it. The sites you can create with Canva look very professional and consistent with the brand image, but you may forget to incorporate elements such as a complex navigation structure or a e-commerce store.
In other words, while you can create a simple online presence with Canva (and a lot of people have done it: over 2 million, according to Canva), it doesn't offer you the kind of professional website creation features that website creation tools like Shopify and Squarespace offer.
The site designer may suit the needs of some users, but if all you need is a basic resume site with a few texts and images, it will do the trick. Over 670 website design templates are available, which you can easily fill in with website content.
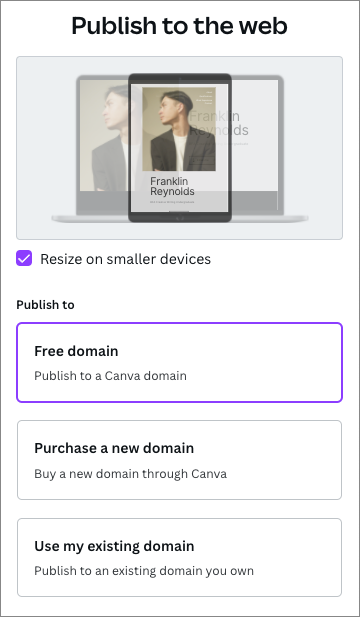
Once you've created your site, you can either publish it to a free Canva site address (yourname.my.canva.site), buy a new domain for it through Canva (using the desktop version only), or map it to a domain you already own.
6. Create products
Another cool aspect of Canva is the fact that you can actually make physical products using the platform.
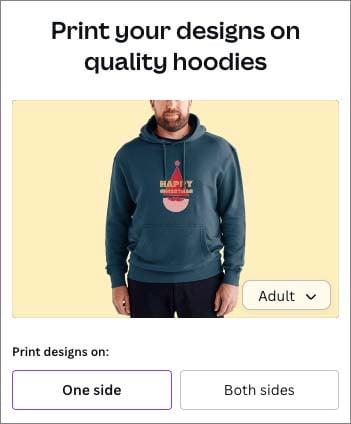
To do this, you have to go to the “Print Products” section, where you can design and buy a wide range of items (35 different products in total).
These include:
- hoodies
- T-shirts
- tote bags
- greeting cards
- stationery (notebooks, brochures, diaries, etc.)
- photo gifts (books, mugs, prints, etc.)
- marketing materials, including retractable traffic signs and banners
For ethical reasons, Canva has implemented an ecological program to offset the environmental impact of manufacturing a product on the platform: for each order placed, Canva plants a tree.
Ultimately, though, I see Canva's product manufacturing option as a “nice to have” feature rather than an essential feature.
First, all of the products available are quite expensive, which means you can't really make something, major it up, and sell it to someone else. The cost of a T-shirt is around 25 dollars, for example.
Second, there is a cap on the number of items you can order at one time. When I tested this feature, all the items I tried to make were limited to 50 copies. So this option is not suitable for those who want to mass produce items.
7. Use Canva on cell phones
As you may have noticed from the screenshots in this post, I largely based this Canva review on the browser-based version of the application (for the record, the desktop versions for Mac OS and Windows are very similar to this one).
However, you can also use Canva on a mobile device, thanks to the iOS and Android applications that are available for the platform.
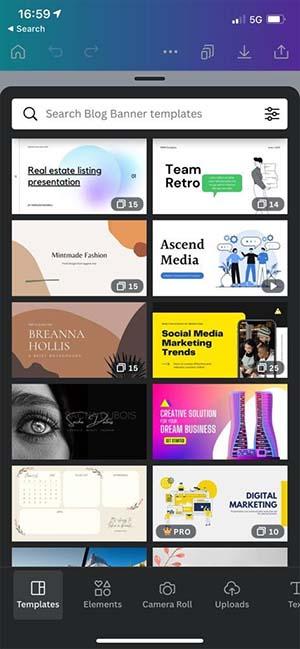
They actually get exceptionally high scores in the Apple and Google Play app stores (4.9 and 4.8 respectively); these are the highest scores I've seen for a mobile application for a SaaS product that we've reviewed.
And after playing around with the iOS version of Canva, I understand why mobile apps are so popular with their users. The mobile version I tested was really easy to use, with an interface that was very similar to the desktop version (although slightly reduced!).
And we're not talking about a scaled down version of the platform here; you can do serious work with Canva on a smartphone.
That said, I would always be inclined to use the browser or the desktop version of Canva whenever possible: editing photos and videos on a phone is pretty tedious and I don't really like doing it!
But for people on the go who want to quickly create an elegant video for social media platforms, Canva's mobile apps are a Excellent option.
8. Ensuring brand consistency
As we saw above, Canva provides users with numerous tools and content to create marketing materials: templates, graphics, stock photos, videos, etc. In theory, you could use all of these elements to design your assets, without needing to resort to anything else.
You can even use Canva to create a complete brand identity, that is, create a logo in Canva, define a color palette, and choose fonts for your brand from the wide range offered by the platform.
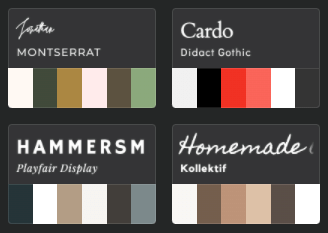
In fact, “suggested” brand identities are available on Canva - color palettes and fonts.
But in practice, most businesses will need to set up Canva so that they can create designs that reflect a brand's identity. Existing.
For this purpose, Canva offers you the option of creating a “brand kit”.
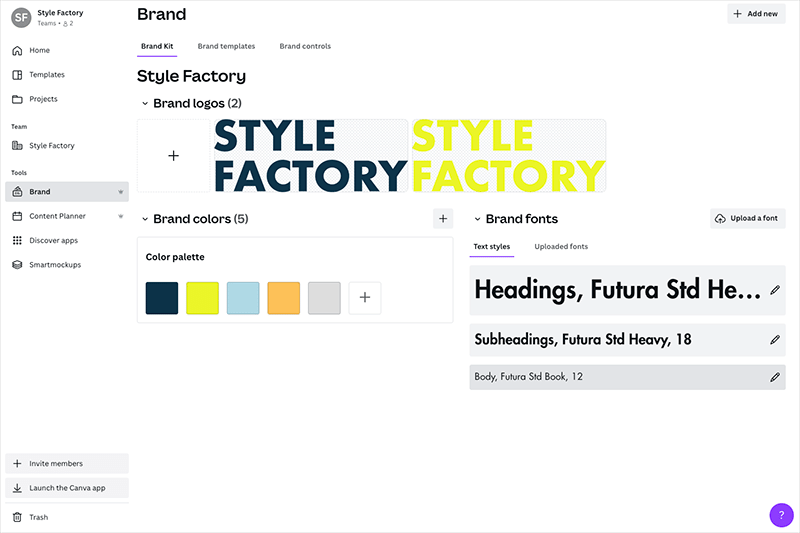
This allows you to:
- add a brand logo
- Define a color palette
- upload your own font.
On paid plans, you can create multiple branded kits (100 on the “Canva Pro” plan, and 300 on “Canva for Teams”).
Once your brand kit is in place, when you create in Canva, you can apply/add any of these brand assets to your design.
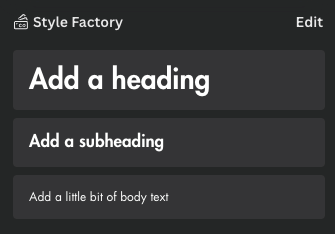
Apply fonts from a brand kit
In the “Canva for Teams” formula, you also have a few other features in the “Brand” section to help you maintain brand consistency in your creations:
- a “brand templates” section, where you can create and store reusable brand templates
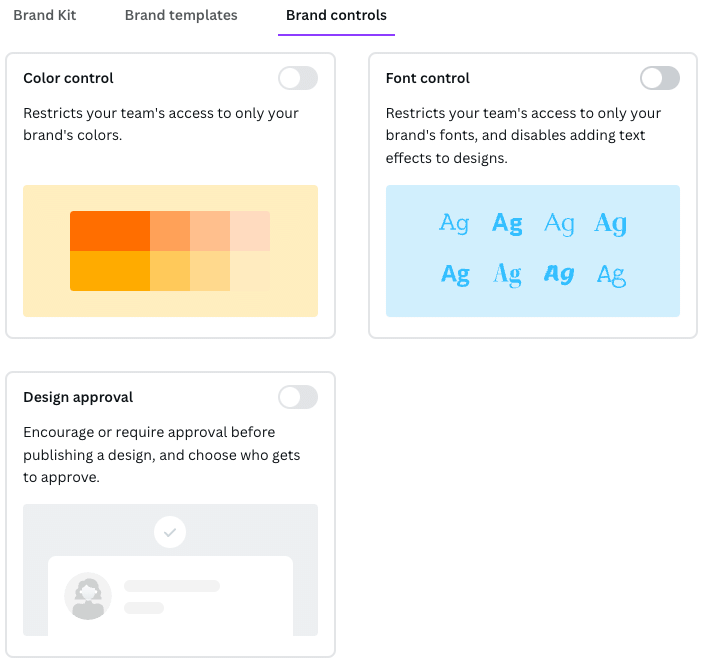
- a “brand controls” section (shown below), where you can restrict the ability of your team members to use colors or fonts that are not part of your official brand guidelines.
If you have other brand assets that you use regularly as part of your brand strategy, such as photographs, backgrounds, etc., you can add them to the Canva “Downloads” section.
To be honest, I would probably prefer to have these items added to the brand kit as well (maybe under a “brand assets” heading or similar).
But otherwise, the brand kit works great and ensures that any media you create with Canva are brand compliant.
Integrations
Like many other SaaS (software as a service) products, Canva offers a series of applications and integrations that add functionality or help it integrate more cleanly with other popular services.
At the time of writing this article, 110 are currently available, and you'll find them in the “application directory,” shown below.
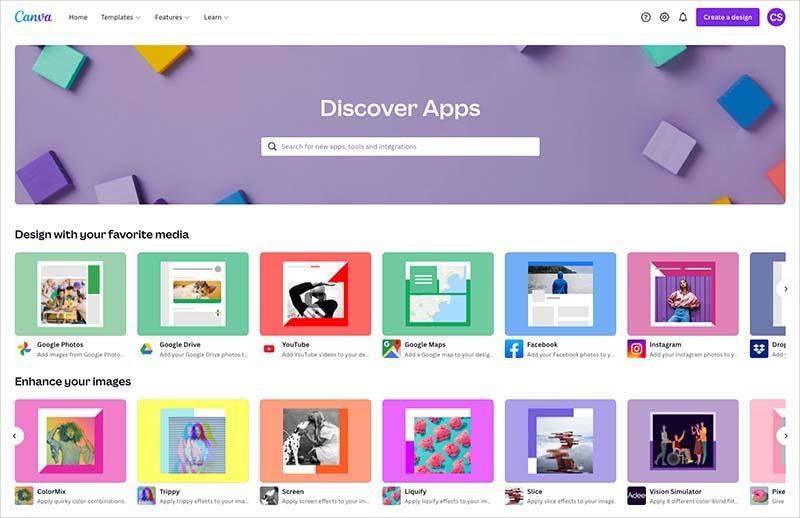
The applications offered are generally intended to add special effects to your images or to retouch them.

Available integrations typically help you import images or videos from other applications into Canva. For example, you can connect your Canva account to services like Google Photos, YouTube, Facebook, and Google Maps and input content into it (which you can then incorporate into your creations).

A particularly useful application for many users will be the “Smartmockups” application.
It allows you to see how your design will look in the context of the “real world”, for example on the cover of a book, in a frame, in a smartphone, etc. It can serve as an integrated alternative to the “PlaceIt” model generator.
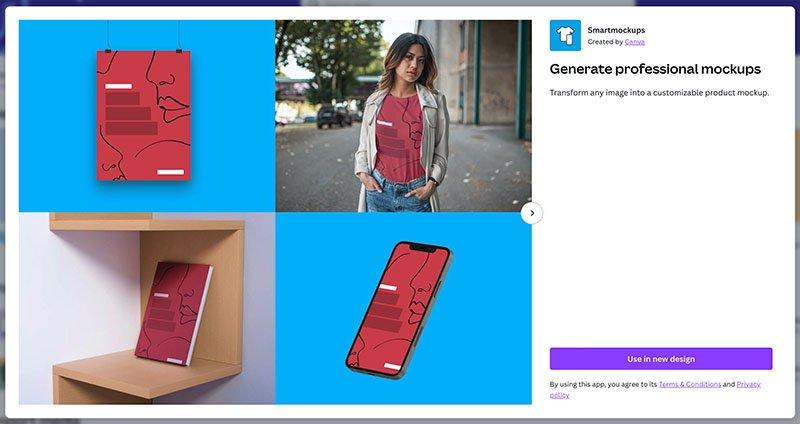
The “Smartmockups” application allows you to see what your Canva design will look like in a real context.
Also worth mentioning is a Microsoft Powerpoint application that allows you to easily export your Canva projects in PPT format, which will be useful for many Microsoft 365 users.
Oddly enough, I couldn't find any Canva apps for major website builders, like WordPress, Wix, Squarespace, and Shopify. These are all services that could eventually benefit from integrating with Canva, because it's so good at producing web graphics and blog banners.
However, email marketing services are supported, including Mailchimp, Constant Contact, and Activity Messenger.
If the proposed applications are not enough for you, you can always consider creating your own. A development platform for Canva provides access to the platform's API and allows you to create your own “content extensions” that allow you to integrate Canva with other tools in a variety of ways. (Obviously, you'll need development skills to do that.)
Pricing
So far, we've looked at all of Canva's key features, but not its price. Now let's dive into this area.
There are three main versions of Canva to consider:
- Canva Free - $0 per month
- Canva Pro - $12.99 per month (for one user)
- Canva for Teams - Price varies (starting at $14.99 per month for up to 5 users)
If you pay for your Canva plan on an annual basis, a 16% discount is applied.
Subject to a verification process, free or discounted plans are offered to educational institutions, and non-profit organizations can use Canva for free.
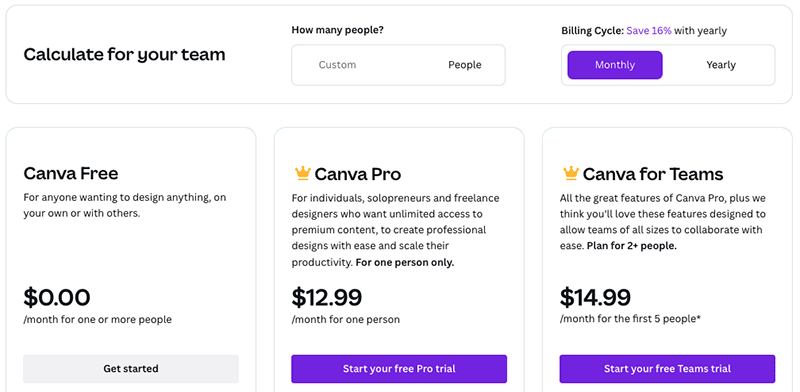
With regard to the differences between these three plans, the main elements to be taken into account are the following:
- Seats - the number of users varies depending on the package. The free plan and Canva Pro only offer one user account, while the “Canva for Teams” plan allows you to buy multiple seats.
- Templates — the paid plans give you a lot more templates than the free plan. The “Canva Pro” and “Canva for Teams” plans allow you to play with 610,000 templates (but you still have access to the 250,000 free templates on the free plan).
- Images and videos — paid plans give you access to over 100+ million stock photos, videos, and graphics; the free plan gives you a wide range of photos and graphics (“hundreds of thousands,” according to Canva), but no videos.
- Brand kits - if you want to easily use your own brand colors and fonts in Canva, you need to sign up for a paid plan. With the “Pro” package, you can create up to 100 brand kits; with the “Canva for Teams” formula, the limit is 300.
- Storage space: The free plan gives you 5 GB of online storage space, the “Pro” plan 1 TB, and the “Canva for Teams” plan 1 TB per user.
- Transparent backgrounds - if you want to produce a design with a transparent background, you need to subscribe to a premium plan.
- User controls - only the “Canva for Teams” package allows you to control what can be uploaded or edited in Canva.
- Support - as we saw above, response times are shorter if you use a pro version of Canva (the response time to questions is considerably shorter with the “Canva for Teams” formula).
Customer support
There are two ways to get Canva customer support.
First, there's the Canva Help Center, which contains searchable archives of help resources and how-to guides.

Email support is also available. The corresponding form is easy to access. With other online applications, contact information isn't displayed until you first look for a solution to your problem in a help center, but Canva makes it very easy to find them (by typing “contact Canva Support” on Google, you'll quickly find out).
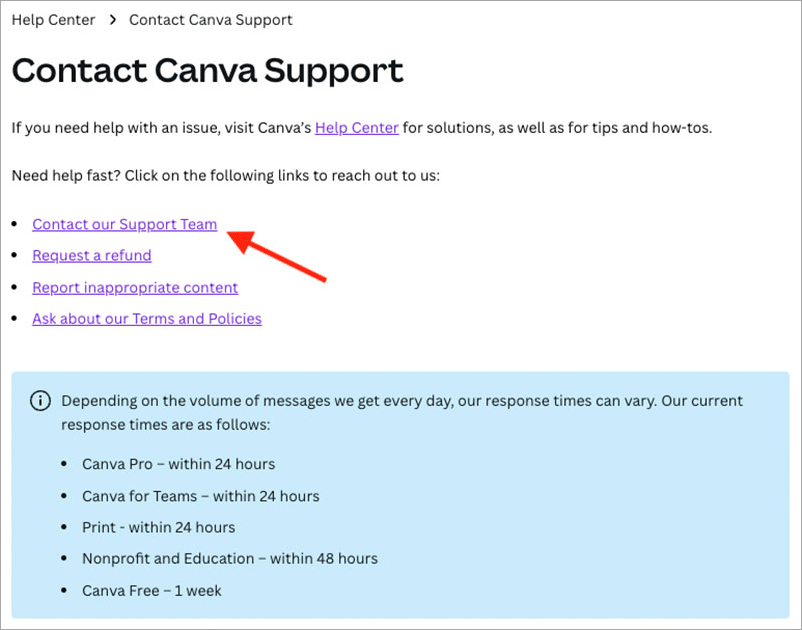
As for the processing of assistance requests, they vary depending on the plan:
- Canva Pro - within 24 hours
- Canva for Teams - priority support within 24 hours
- Printing - within 24 hours
- Nonprofit and education - within 48 hours
- Canva Free - 1 week
It's a shame that telephone or live support isn't available, but the fact that Canva free plan users get support is commendable, and given Canva's low price level, it's fairly understandable that customer service is only via email.
How do I create a free Canva account?
The first thing you need to do is go to canva.com and create a free account.
You can sign up using your Google account, Facebook account, or even email.
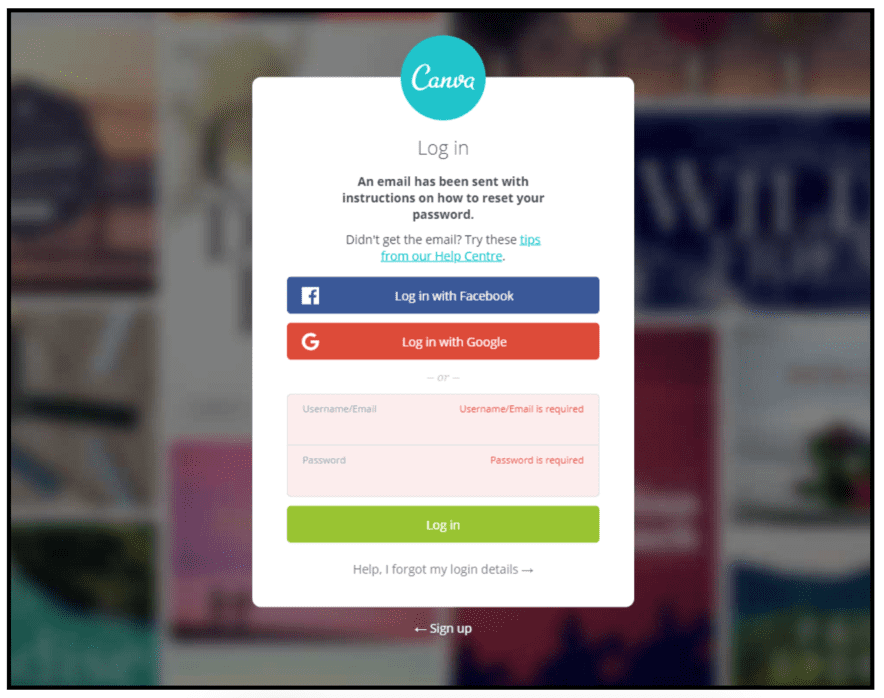
Once you create a free account, you'll have access to over 8,000 free templates, including social media posts and presentation templates.
You'll also have access to a photo library with hundreds of thousands of photos.
FAQs
Is Canva Pro worth it?
You might be wondering if you should go for the free version or the Pro version.
Here's what I recommend. If you're just starting out, go ahead and try the free version. Whether you decide to use the paid version or the free version, is Canva worth it?
In my opinion, 100% yes. And the pro version has enough features to justify the expense.
Why is Canva a must-have tool?
Canva is a graphic design program for everyone.
And when I say everyone, I mean everyone!
The great thing about this tool is that you don't even have to be a graphic designer or have an eye for design or design elements to use
And it gives you access to everything from stock photos to fonts, videos, music, and even the graphics and icons that will make your design stand out.
In short everything! If this is not yet the case for you, create your free account now!
Final Verdict
Overall, Canva is a really solid and easy to use application that comes with lots of features that simplify the design of visual resources. While it doesn't always replace a professional graphic design tool or video editing application, it is importantly easier to use than these tools and, in many contexts, it will do the job as well as they (and cheaply, too).
The main disadvantages of Canva are that its output formats are limited, there is no way to save projects, and support is only provided by email. Of these three faults, the issue of output formats is the most significant, as it limits your ability to start a design in Canva and have it completed by a professional designer in another application. But given Canva's low cost, it's hard to feel too bothered by these omissions.
.svg)

-2-2.avif)


