Error pages 404s are often considered to be problems for your website.
However, with a bit of creativity and the right tools, they can become real allies for generate leads and strengthen your brand image.
In this tutorial, we will see how to use Webflow, the no-code platform par excellence, to transform your 404 pages into conversion opportunities.
Even if you are a beginner, you can easily implement these tips to optimize the experience of your visitors and boost your lead generation.
FOR INFORMATION >> This tip is reproducible with any preferred CMS (Webflow is not a mandatory requirement)!
Prerequisites
Before you get started, make sure you have:
- A Webflow account (you can create a free one on webflow.com)
- An existing website on Webflow or a new project dedicated to your 404 pages
- Some basic notions about the Webflow visual editor (if necessary, do not hesitate to consult the official documentation or their tutorials on YouTube to get started)
That's all you need to give new life to your 404 pages with Webflow!
Detailed Step-by-Step Method
1. Create a New 404 Page on Webflow
The first step is to create a new page that will serve as a template for your 404 pages. Here's how to do it:
- Log in to your Webflow account and open the project of your choice.
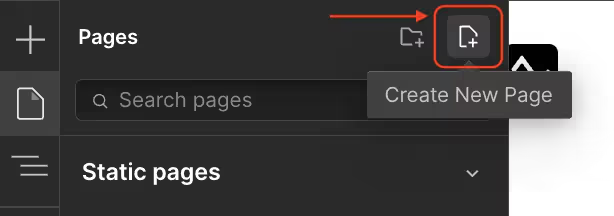
- On the dashboard, click on “Pages” in the left sidebar.
- At the top right, click on the blue “+ New Page” button to add a new page.
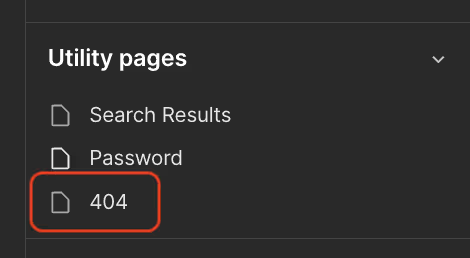
- In the left side panel, your 404 page will appear in the “Utility pages” (it may already be present and you may not need to create it)
Your new 404 page is now created, ready to be customized. It's up to you to play to transform it into a lead machine!
2. Guide Visitors With an Adapted Navigation Menu
Once on your new 404 page, the priority is to help the user find their way back and access the content they were looking for.
To do this, there is nothing like a well-thought-out navigation menu.
Here's how to add it from the Webflow visual editor:
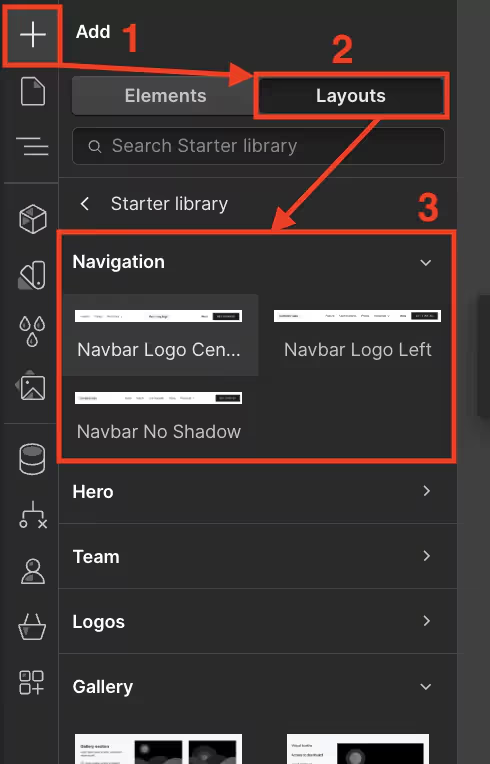
- Click on”Add“at the top left, then choose”Layouts“>”Navigation “in the list.
- Drag and drop the Menu component to the desired location on your 404 page.
- Customize your menu by clicking on it and then using the “Settings” panel that appears on the right.
In this menu, you can in particular:
- Add new links to the key pages of your site (Home, Contact, Products, Blog...)
- Customize the menu design (colors, typography, spacing...) to match your graphic charter
- Define menu behavior on mobile with responsive design options
With an optimized navigation menu, your visitors can easily bounce off your 404 page and continue their journey on your site. A first step towards conversion!
3. Integrate a Lead Generator Form
To go further and transform your lost visitors into qualified contacts, there's nothing like a good old lead generation form.
And good news, Webflow makes it very easy to create them, directly from the visual editor.
Here are the steps to follow:
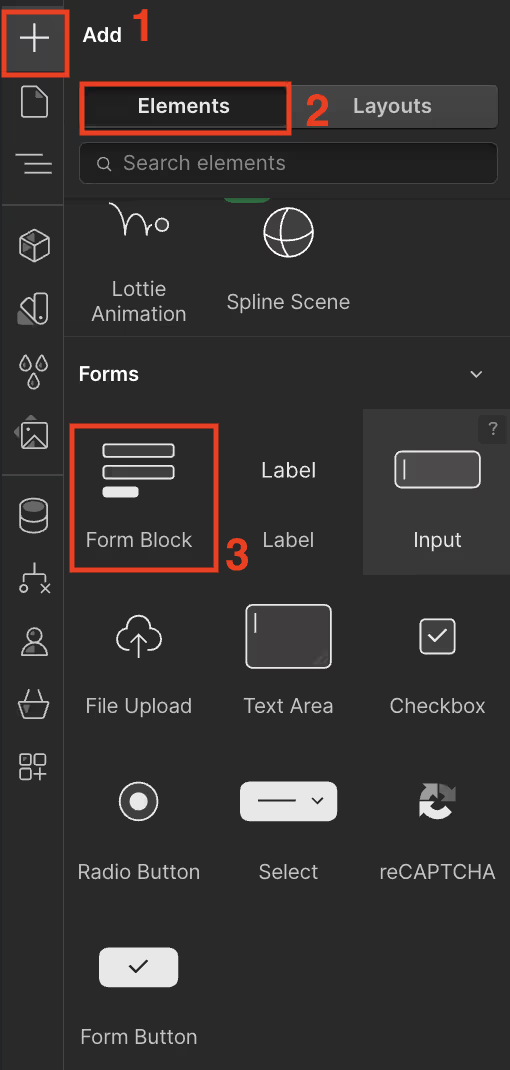
- Still in the page editor, click on”Add“then choose”Elements“>”Form Block“in the list.
- Drag and drop the Form component to the desired location on your 404 page.
- Customize the design of your form (colors, typography, spacing...) always from the side panel on the right.
- Configure the options of your form (success message, recipient of submissions...) from the “Form Settings” tab of the panel.
Once your form is ready, visitors can leave you their contact details in exchange for value-added content of your choice (ebook, video, template...). The start of a great relationship!
4. Boost Your Sales
Finally, to go even further in conversion, why not offer an exclusive promotional offer on your 404 page?
It's super easy to set up with Webflow:
- From the visual editor, create a new “Div Block” component to integrate the content of your offer (visuals, text, promo code...).
- Customize the design according to your preferences from the “Settings” panel.
- Create a sense of urgency by integrating a countdown timer with the drag-and-drop “Countdown” component into your block.
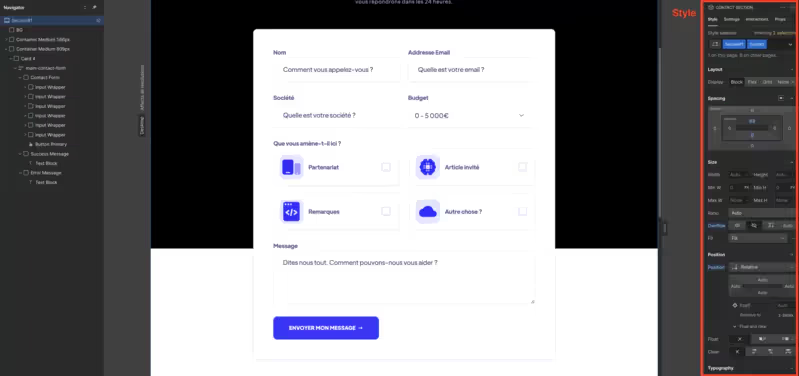
- Finally, direct your visitors to a dedicated sales landing page by creating a “”Button“targeting to the chosen URL.
Your visitors will only have to enter the promo code on your sales page and finalize their order. All without leaving your site and starting from a 404 page!
Here is a great example that allows the user not to suffer the frustration of the 404 page while reaping value for free.
- Ideally, use a form to collect emails
- Generally, Internet users will give you their email at this stage if your authority is already established.
- If you have no or very little authority in your field, consider adding action buttons to your lead magnet (once the leads have been “warmed up”)

Conclusion
You now have all the keys to transform your 404 pages into real growth drivers thanks to Webflow.
Attractive design, optimized navigation, lead generation, promotional offers... All these assets are just waiting to be exploited!
Don't wait any longer to review your error pages and exploit their full potential.
With this tutorial and the power of Webflow, you have all the tools in hand to create 404 pages that will help you score points rather than lose them with your users.
So get started, test, analyze your results and optimize your pages accordingly.
Each 404 page can become an opportunity, provided you know how to take advantage of it intelligently!
.svg)


%252520(1).jpeg)