What is Restream?
Definition and history of the platform
Restream is a streaming platform innovative live stream that is revolutionizing the delivery of video content. Launched in 2015 in Ukraine - now headquartered in Austin in the USA - this company quickly established itself as an essential tool for content creators around the world.
Its particularity lies in its ability to simultaneously broadcast videos on over 30 social networks. Among these integrations, we find the giants of the sector such as Facebook, YouTube, Twitch and LinkedIn, but also more specialized sites or applications.
This multi-platform approach allows creators to maximize their audience by simultaneously reaching different audiences on various social networks
Restream key features
1. Live streaming on multiple social platforms
The Multistreaming is at the heart of Restream's offering. This feature allows for live streaming on over 30 platforms at the same time, providing unparalleled reach for each brand.
This service integrates seamlessly with popular third party software like OBS, zoom, and XSplit, allowing users to keep their favorite tools while benefiting from the power of cross-platform delivery.
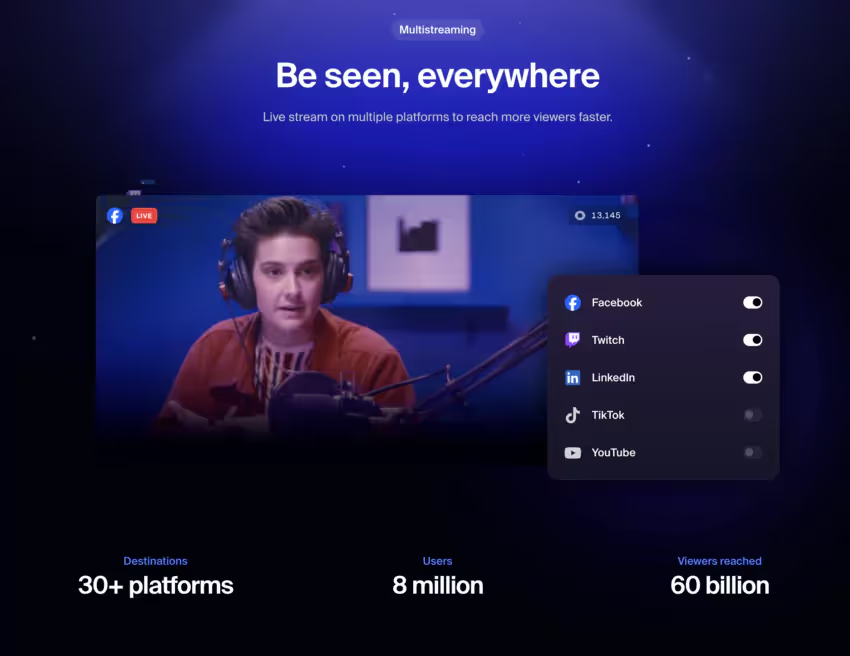
❤️ Critical review : Restream makes it possible to broadcast on more than 30 platforms simultaneously, considerably expanding the audience. Integrating with OBS, Zoom, and XSplit simplifies the process. However, beware of reduced performance on Wi-Fi during multiple broadcasts.
2. Creating live streams
Restream Studio is a streaming solution directly accessible from your browser, eliminating the need to install additional software on your computer. The solutions it offers include:
- The possibility to invite up to 10 guests
- The addition of QR codes And of custom logos
- The use of graphic overprints to improve the visual aspect
These tools make it possible to create professional results even for first-time users.
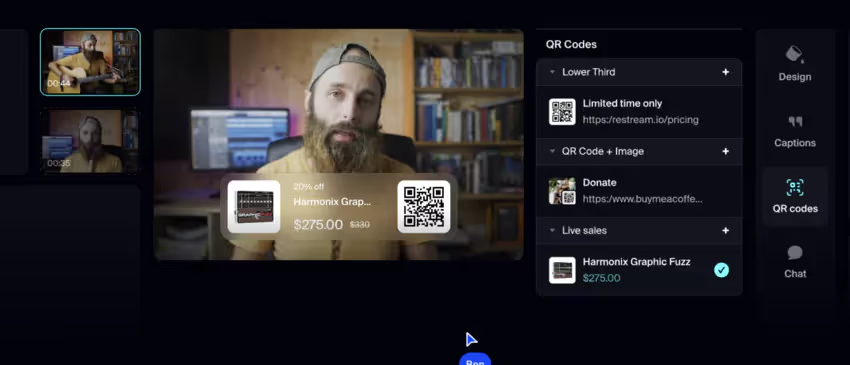
❤️ Critical review : Accessible via browser, it offers professional features such as inviting participants and adding custom logos. Regarding the drawbacks, some minor bugs have been reported, especially in the chat and message latency.
3. Real-time audience and feedback management
The Cross-platform chat by Restream unifies discussions from all platforms in a single interface. This feature also includes a relay bot, allowing viewers from different platforms to interact with each other, creating a unified community around your content.
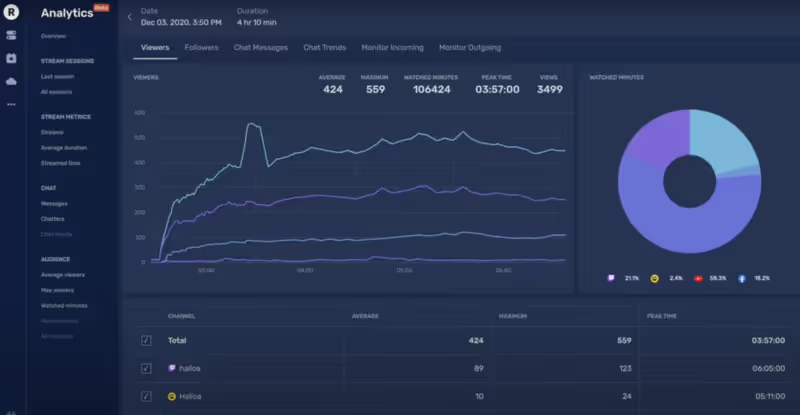
Restream also offers real-time analytics detailed, accessible from a single dashboard. These analyses cover:
- The number of spectators at the events (interviews, podcasts, gamer recordings, etc.)
- Chat messages to process each response
- The global commitment of people
This information allows creators to adjust their live content to maximize the impact of their stream.
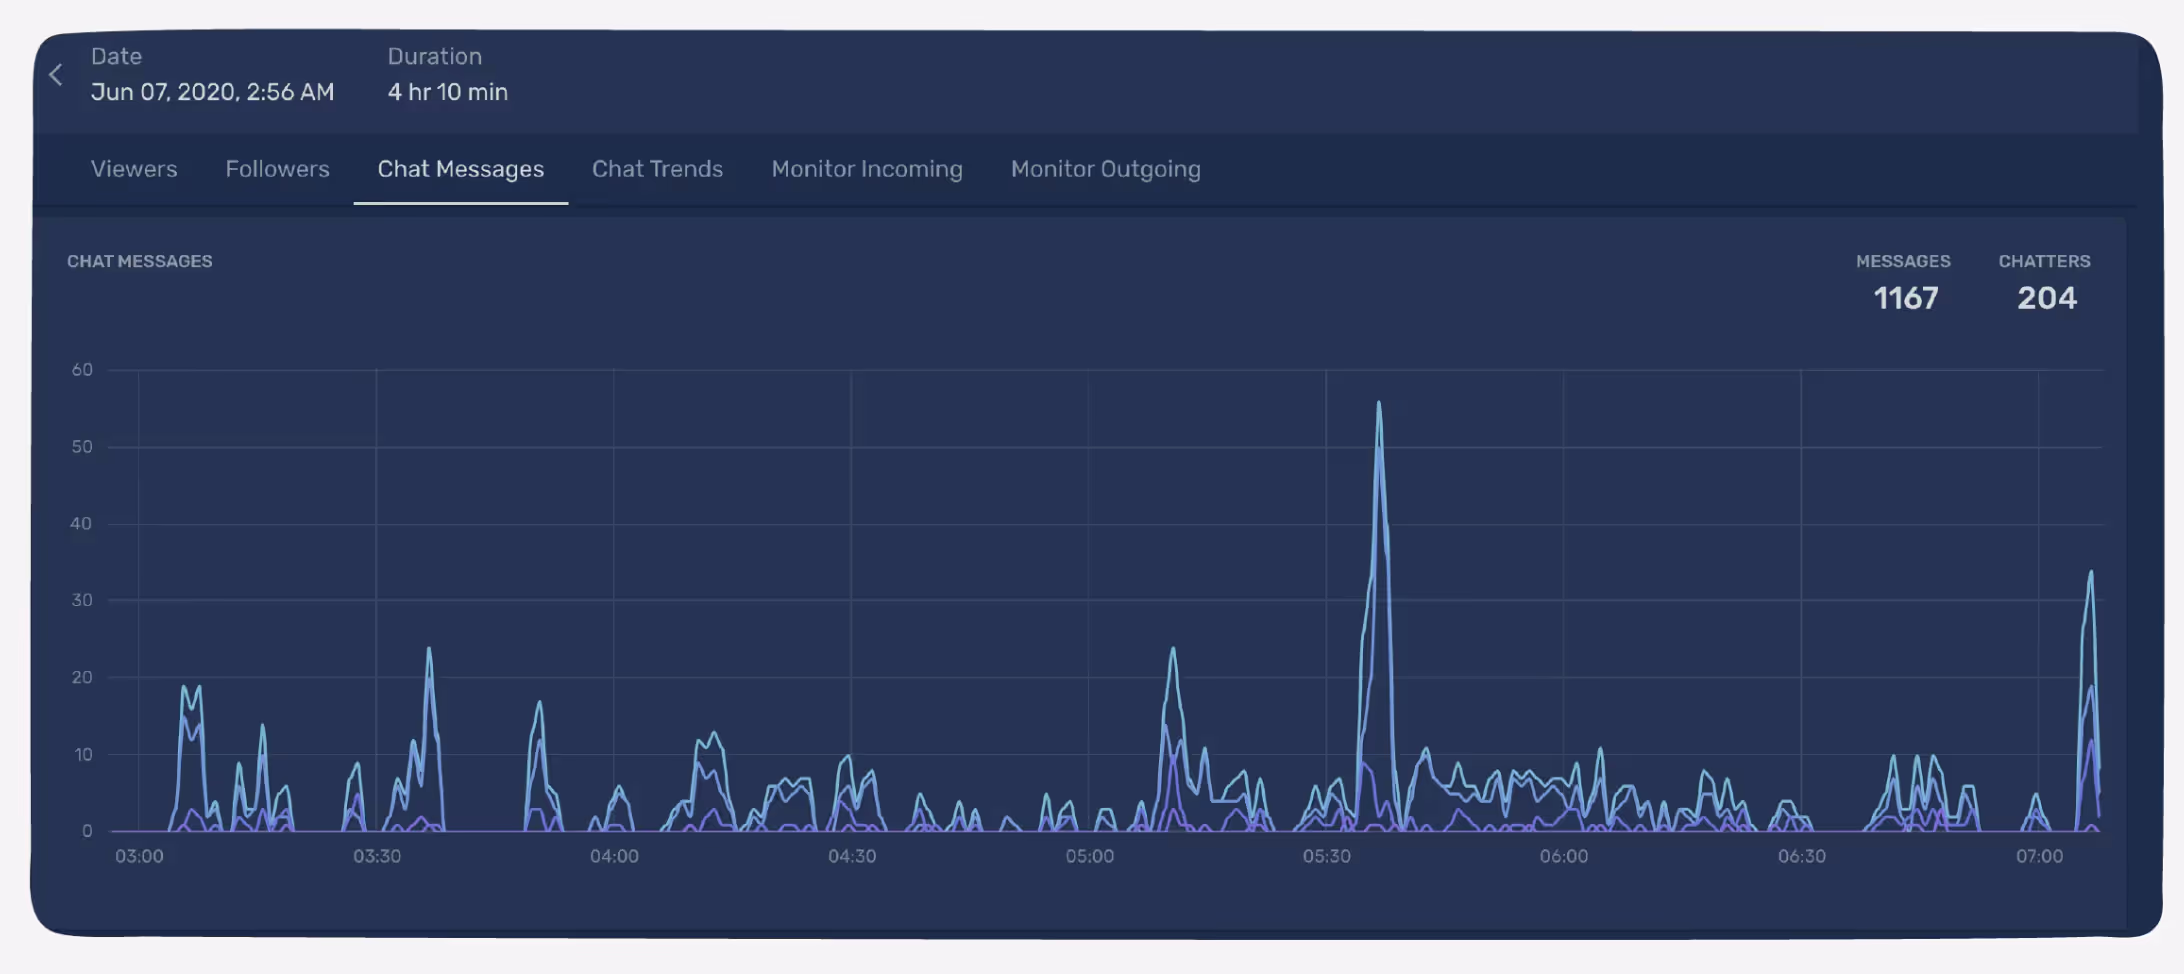
❤️ Critical review : Unified chat centralizes interactions across platforms, facilitating engagement. Real-time analytics provide valuable audience data. The stability of the chat and the analysis features, still in beta, need to be improved
Setting up your Restream account
Setting up is a quick and easy process. Here are the essential steps to get started on your cross-platform streaming adventure.
Sign up

Start by creating an account for free On their official website. This initial step is designed to be intuitive and only takes a few minutes.
Once created, you can perform the following actions:
- Configure basic settings
- Select your favorite streaming platforms
- Setting the stage for your first live stream
Restream's user-friendly interface guides you through each step, making the process accessible even to streaming newbies.
Account security
La protection of your information is essential in today's digital world. Restream takes security seriously and offers you options to strengthen your account protection.
An important step is to set up thetwo-factor authentication. This security measure adds an extra layer of protection, ensuring that only you can access your account, even if someone discovers your password.
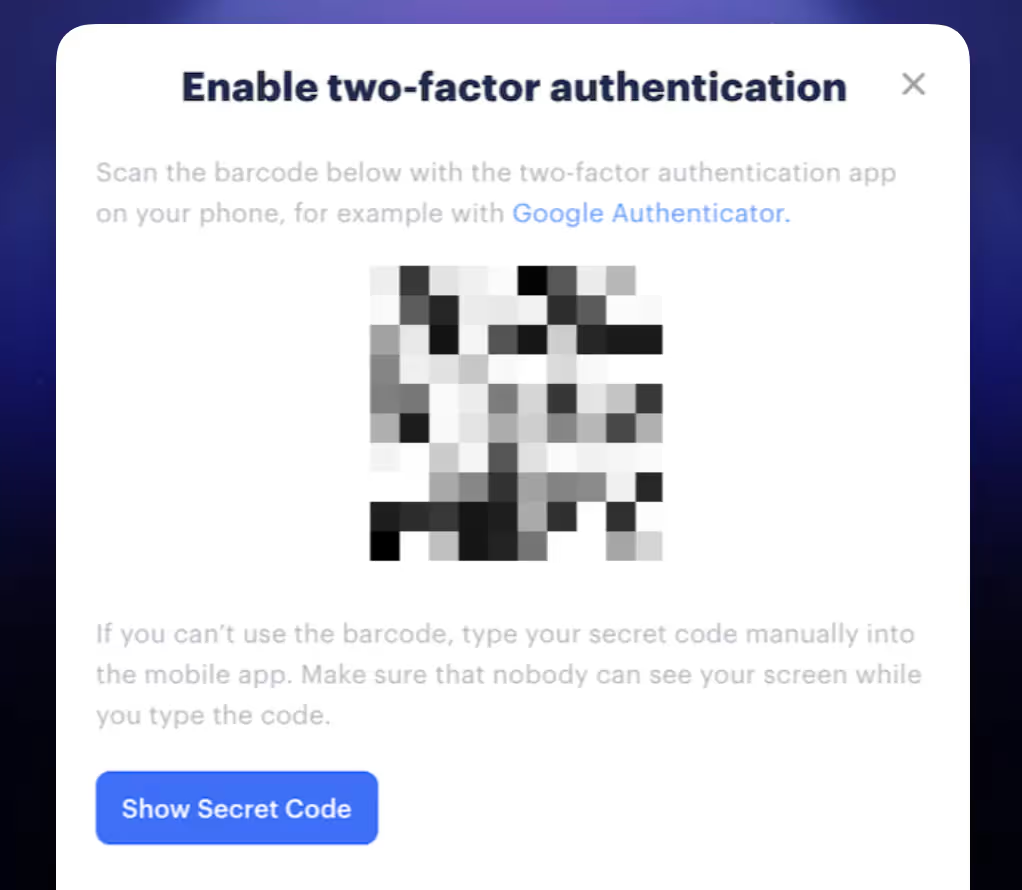
By taking the time to properly configure these security settings, you create a safe environment to manage your live events.
With these simple sign-up and security steps, you'll be ready to explore all the possibilities Restream offers to improve your online presence and expand your audience.
Using Restream Studio for streaming
Overview of the interface
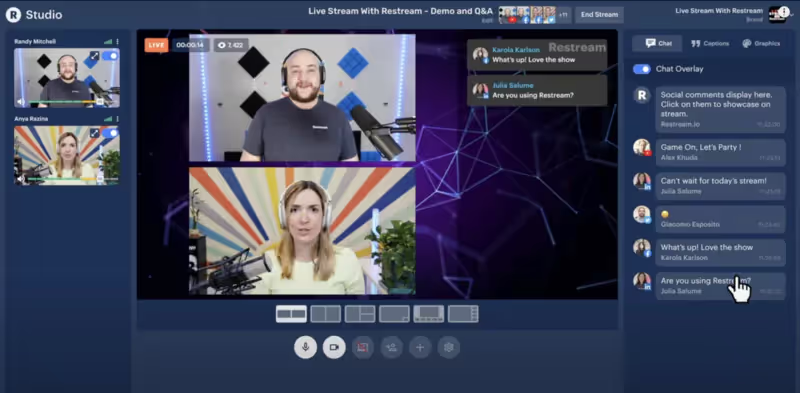
The software offers a simple to use interface, designed to facilitate the creation and management of live streams. Its design allows even inexperienced users to easily navigate through the various functionalities.
The interface is organized into several main parts:
- A preview space
- A panel to control the sources
- Tabs to access advanced settings and options
This organization allows quick access to all important functions, allowing you to focus on creating content.
Key features for creating live streams
Multiple sources
the software allows you to use multiple video sources to improve your broadcasts. So you can:
- Use multiple cameras to vary viewpoints
- Show your screen for demonstrations or presentations
- Involve remote participants for interviews or live discussions
The integration of these different sources helps you create varied and interesting content for your audience on all platforms.
Graphic elements
To give a neat look to your flows, it offers visual customization tools:
- Add visuals to show important information or calls to action
- Use custom backgrounds to create a recognizable visual identity
- Integrate pre-recorded videos to diversify your content
These visuals aren't just decorative, they help reinforce your message and keep your audience's attention.
Thanks to these accessible and effective features, it allows you to create good quality live streams regardless of your level of streaming experience. These tools will help you produce professional lives for your audience.
Practical Guide to Managing Your Live Stream with Restream
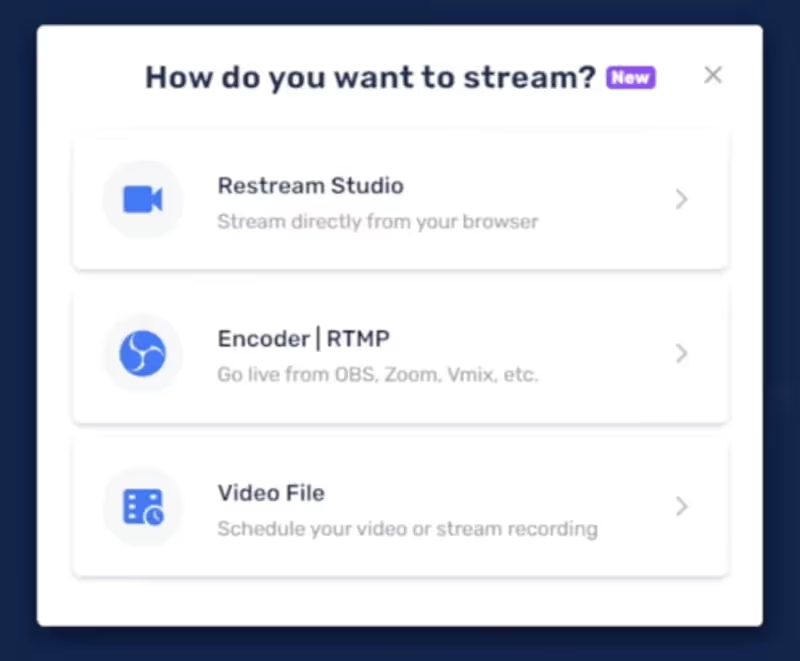
Step 1: Access Restream Studio
To get started, go to the Restream website (www.estream.io) and log in to your account. Once on your dashboard, click “Go Live” at the top right of the screen.
The interface will be displayed, presenting a central preview area and side panels for managing sources and settings.
Step 2: Add sources to your feed
In Restream Studio, look at the left sidebar. There you will find an icon “+”. Click on it to open the menu for adding sources. Here are the types of sources you can add:
- Camera : Select your webcam from the list of available devices.
- Screenshot : Choose which screen or app to share.
- Media files : Import pre-recorded videos, images, or audio files.
- RTMP stream : Enter the URL of the source feed to integrate content from other software.
For each added source, you can resize and position it in the preview area using your mouse. Feel free to overlay different sources to create a custom layout.
Step 3: Set up broadcast platforms
Go back to the main dashboard of this tool by clicking on the logo at the top left.
Look for the option “Add Destination” and click on it. A list of platforms will be displayed.
Select the platforms you want to broadcast on (Facebook, YouTube, Twitch, etc.). For each platform you choose, follow the on-screen instructions to connect your account. This generally involves allowing this tool to access your account on the platform in question.
Once all of your platforms are added, they will appear in your Restream dashboard, ready to receive your broadcast.
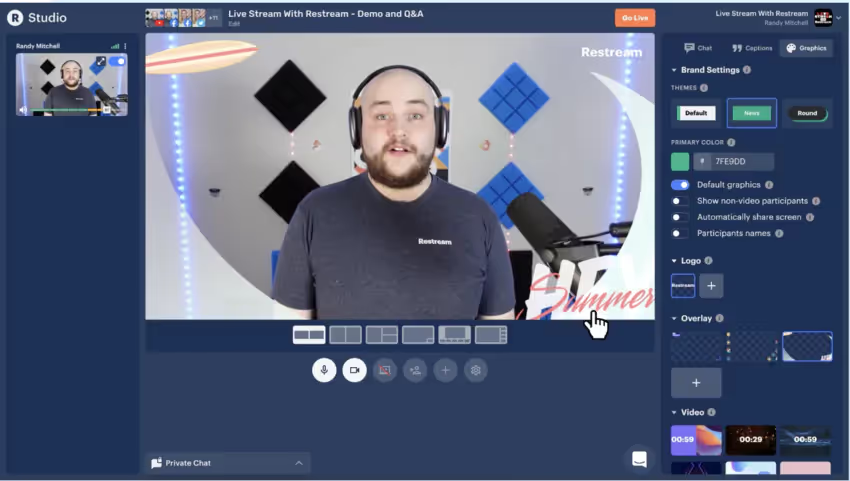
Step 4: Personalize your feed
Back in the Studio, explore the tabs at the top of the screen:
- Graphics : Add logos, banners, or animations.
- Overlays : Integrate predefined or custom overlays.
- Titles : Create titles and subtitles.
To add an item, simply drag and drop it from these tabs into the preview area. You can then adjust its size and position.
Step 5: Set up chat and interactions
Click on the tab “Cat” to activate the “Overlay chat” which will show chat messages directly on your feed. Use the customization options to adjust the appearance of the chat on the screen.
To respond to messages, use the built-in chat box, you'll see all messages centralized here, making it easy to interact with your audience.
Step 6: Start your broadcast
Before you get started, make sure everything is ready:
- Verify that all of your sources are set up correctly.
- Confirm that your streaming platforms are connected.
- Test your audio and video one last time.
When ready, click on the big red button “Go Live” at the top right of the interface. Your feed will start simultaneously on all selected platforms.
Step 7: Manage your live stream
During your stream, you can:
- Switch between different sources by clicking on them in the sources panel.
- Respond to comments via the unified chat interface.
- Add titles or graphics on the fly using the corresponding tabs.
Keep an eye on the real-time stats displayed to track the performance of your stream.
Step 8: Complete and save your feed
To stop your stream, click on the button “End Stream” located next to the “Go Live” button.
If you activated recording before starting (“Record” next to “Go Live”), your stream will be saved automatically. You can find it in the tab “Videos” from your dashboard after the end of the stream.
Step 9: Resolve Common Issues
In case of problems during your broadcast:
- Check your internet connection if the flow is unstable.
- Refresh Restream Studio if a feature is not responding.
- Use the live support chat, accessible via the help in the right corner, for immediate assistance.
Be sure to check the service's knowledge base regularly for additional tips and feature updates.
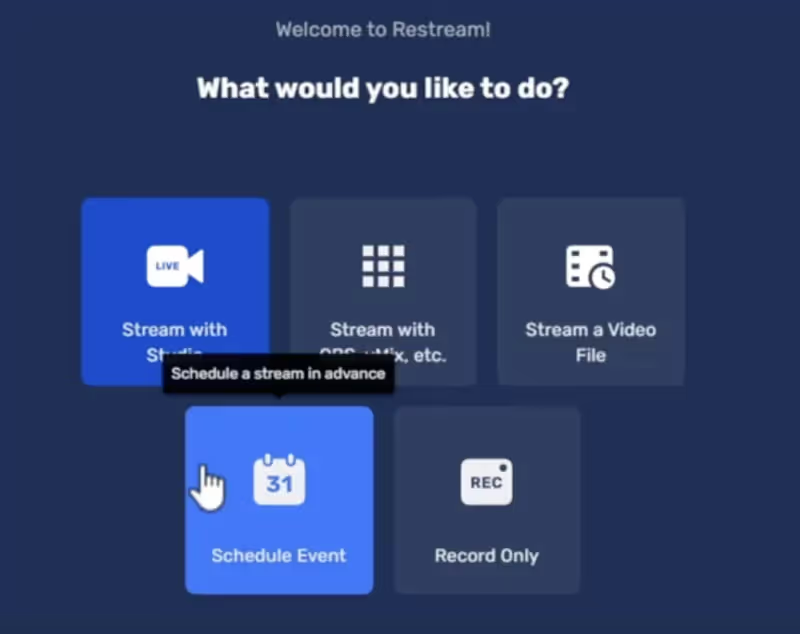
By following this step-by-step guide, you'll be in a position to effectively create, customize, and manage your live streams with Restream. With practice, you'll quickly become an expert in cross-platform streaming.
Conclusion
As a novice in the world of streaming, this tool offers you a powerful tool set to simplify and enrich your lives. Using Restream Studio not only allows you to broadcast on multiple platforms at the same time, but also to effectively interact with your audience through centralized chat.
Key service benefits include:
- An intuitive and easy to use interface
- The ability to reach a wider audience without extra effort
- Customization options to make your lives more professional
Whether your goal is to share tutorials, organize webinars, or simply expand your audience, this service provides you with the tools you need to succeed.

Don't forget to:
- Explore all the features offered by the platform
- Use available resources to improve your skills
- Experiment with different types of content (video, podcasts, etc.) to find what works best for you
With this software, you have the necessary resources to make each idea professional. Get started, experiment, and watch your audience grow.

.svg)


